Scanning Your Images
Choosing Good Scanner Settings

Scanning an image does take a bit of pre-thought before you start to scan your images. You will need to go through a setup for your scanner’s settings. Don’t just start scanning your images, as the settings from a prior scanning session may not be what you need for the current one.

As you are scanning photos, you will want to check the ones scanned for artifacts. It’s best to keep the target Explorer folder open so that you can check on your photo quality every so often. At times during the scanning process, you may notice small colored scanning lines appear across your digital photos. The scanning plates will occasionally pick up a bit of sticky goo from a photo or two. The scanning glass will need to be cleaned if that is the case. You will also want to check the file sizes of your photos to ensure they are not huge or too small of files. The small files will pixelate when you try to zoom in on them. They may look fine in Windows Explorer, but not when you try to preview them at 100% zoom. This is the reason that we try to set the scanner settings up beforehand.

There are many different types of scanners that are best used for specific types of scanning projects. The standard flatbed scanner, expecially if it has a lighted lid inside, can be used for most everything. It just may be much slower for quite a few projects.

Setting Up Your Scanner Session

It is very important to go through this process of setting up your scanner session BEFORE you start scanning. You have no idea what settings a prior Center patron my have used. The “target folder location” to scan to, the “image DPI settings” may be totally off from what you need for your photos, and the “image quality” may be set to mild compression or more. There are other settings discussed below that need to be reviewed as well. I have seen this step skipped over and then the patron gets home and realizes that the images are all pixelated or too compressed, as they had scanned at too low of DPI settings on the scanner.

What Scanner DPI Settings Should I Use?

This topic is extremely important to understand. If incorrectly selected, you may end up with scanned images that could be very small and pixelated, OR they could become extremely large image sizes that are hard to manage.

How do we know what DPI (dots per inch) settings the scanner should be set at? It simply depends on the size the images to be scanned. The smaller your images, the higher the DPI setting you will need.

Let’s review why image “resolution” is so important and how it relates to setting a scanner’s DPI settings.

What is the size of your photo to scan?
-------------------------------
8” X 10” - Use 300 dpi
5” X 7” - Use 300 dpi
4” X 6” - Use 600 dpi
2” X 3” - Use 1200 dpi

What Kind of Image Format Setting Will I Scan To?

Each scanner app will have options to scan your images to different format types, like 8 bit or 16 bit GRAYSCALE, 24 bit or 48 bit COLOR.

For our Center patrons, all they need to select is either 8-bit grayscale setting for non-color images OR 24-bit color setting for color images. Using any of the other settings can create problems in finding a photo editing app that could edit the images.

What Format Will You Save Your Images To?

There are several different formats that can be used to save your images to, like TIFF, JPEG, PNG and others.

If you are an "archivist", then you would choose TIFF. These type of files can become quite large in size as they are not compressed. Each time that you open, edit, and save them, they will not lose pixel data.

However, for the majority of us, the JPEG or JPG image type is preferred as long as you also ensure that the "no compression" setting is selected. For the Epson scanners, this setting is found, not by just selecting JPEG, but selecting the JPEG options at the bottom of your image format dropdown box.

The problem with saving in this image type is that there will be some mild compression of your image's pixel data each time it is opened, edited, and then saved. No image file compression will occur with just opening and closing the file. If you open, EDIT, and save one time, you will also be fine. It’s just the process of repeated edits and saves that will degrade the image quality. JPEGs store with a smaller file size and are an industry standard file format.

PNG files are used more for internet type files. They can be set to not store a background. You will see a lot of examples of this image type on my web pages.

Destination Folder Setting

There is nothing more frustrating than scanning a batch of images and then wonder what folder they were scanned to. Each scanner app will typically have a setting that allows you to set a “target” folder where the digitized images will be scanned to. Set this up ahead of time.

It’s a nice practice to keep an Explorer window open to the target folder so that you can see files added as you continue to scan them.

Another good practice is to periodically open a digitized image to look at image quality and to see if there are any scanning lines occurring from a dirty scanner glass, especially with the rapid image scanners.

Using the Scanner Preview Function to Crop Photos

A common error by folks scanning their photos is scanning the whole scanner bed with a small photo on it. The photo gets saved and even uploaded to FamilySearch looking something like this image.

The problem is, beyond having a lot of white space with a small photo on it, is that when zooming in on the image, the image will start to become pixelated. It would have been easier to crop this photo in preview mode and then scan just the photo at the correct scanner DPI setting to avoid these issues.

"Image Prefix" Setting

You can set the image prefix for your scanned images like, img0001, img0002, img003, and so on. If you have batches of images with different events, years, groups, and such, you can set the image prefix for each group to be something like:

Sarah'sBirthday001, …

1985Christmas001, ...

SmithFamilyReunion001, ...

Be creative. You WILL, of course, want to rename your images with better labels after your scanning project for the day is done. The idea behind the Prefix Setting is simply to keep your scanned images into a semblance of a group.

Missionary Communications Board

© 2026 Stephen A Meyers, All Rights Reserved.

Common Types of Scanners
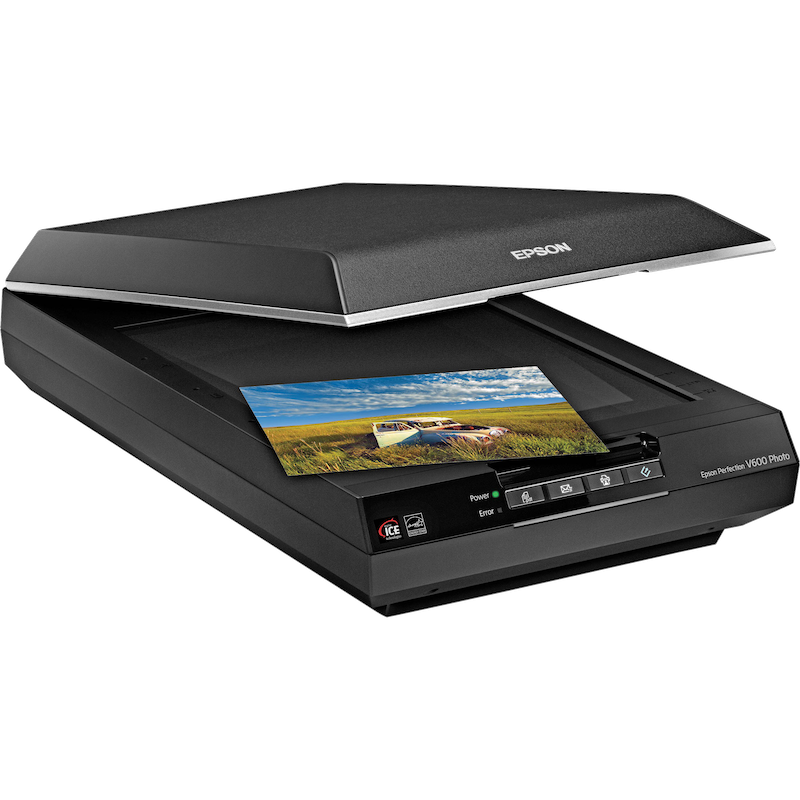
Flatbed Scanners

Flatbed scanners are probably the most common type of scanner found in households. The photos are placed on a glass scanning bed where they are then converted into a digital image on the computer, and then stored to the computer hard drive. Typically there is a much greater control over setting resolution or "dpi" with the software using flatbeds.

These scanners come in different scanning bed sizes, like "Letter" (8.5"x11"), "Legal" (8.5"x14"), and Large Format (18"x24" or other).

The Letter sized scanning beds are very useful for scanning old & fragile letters, but will often have options to scan slides or negatives if the lid has a lightbar in it.

The Legal sized scanning beds are useful for the elongated old genealogy sheets that were used years ago. However, those types of sheets are probably best scanned in a "rapid scanner" as they scan much more quickly.

The Large Format scanning beds are great for scanning photo albums or large photographs.

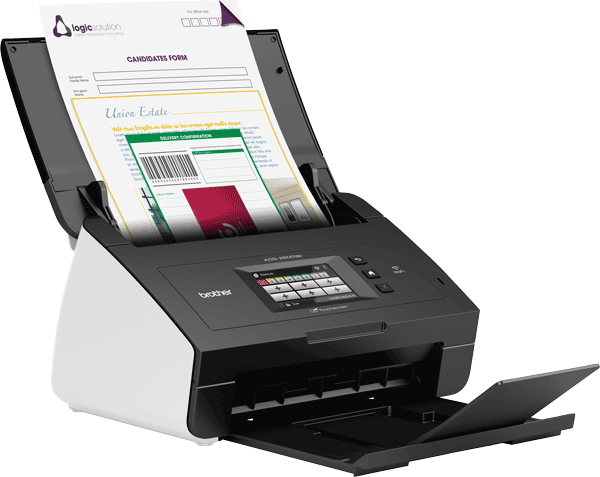
Rapid Photo or Document Scanners

There are non-flatbed scanners that come with what is called an ADF (automatic document feeder) that will rapidly scan a stack of photos or papers. Scanning a multipage document into a PDF (Portable Document File) is best accomplished with this type of scanner.

Some scanners may be designed ONLY to scan photos and NOT paper documents, so be sure you are aware of scanner characteristics. These scanners can scan up to 50 images/minute and a little slower if scanning both sides.

Rapid scanners are typically limited to 300 dpi, 600 dpi, and occasionally 1200 dpi settings. The higher settings are helpful for photos less than about 3" wide.

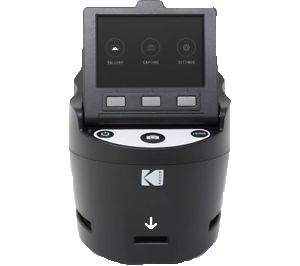
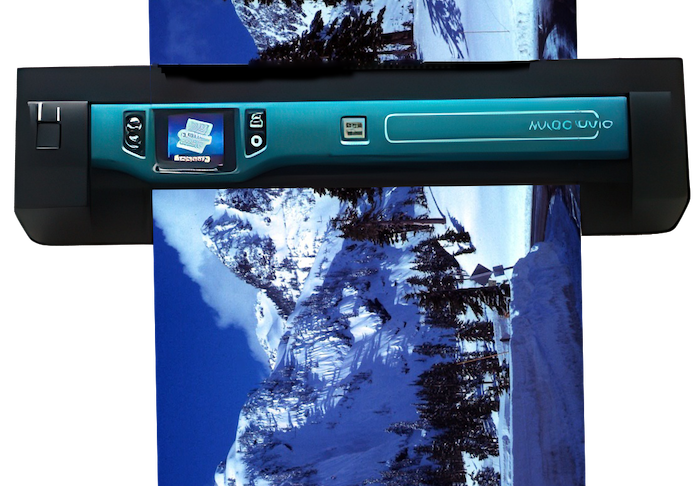
Slide or Negative Scanners

There are many different types of slide scanners. Some use a camera attached to a Kodak Carousel Slide Projector to scan each slide. Others may use a long slide tray. There are some flatbed scanners with lighted lids that can also scan slides. These can scan at very high resolution (DPI), but can also take several minutes to scan one slide.

One of the newer slide scanners made by Kodak is the Scanza. It can quickly scan and produce good quality scans, although you manually (though quickly) push the slides through a small tray, then capturing the image. The resulting image dimensions are high, 5728 pixels x 3824 pixels, creating a good quality output. It will also scan negatives as well.
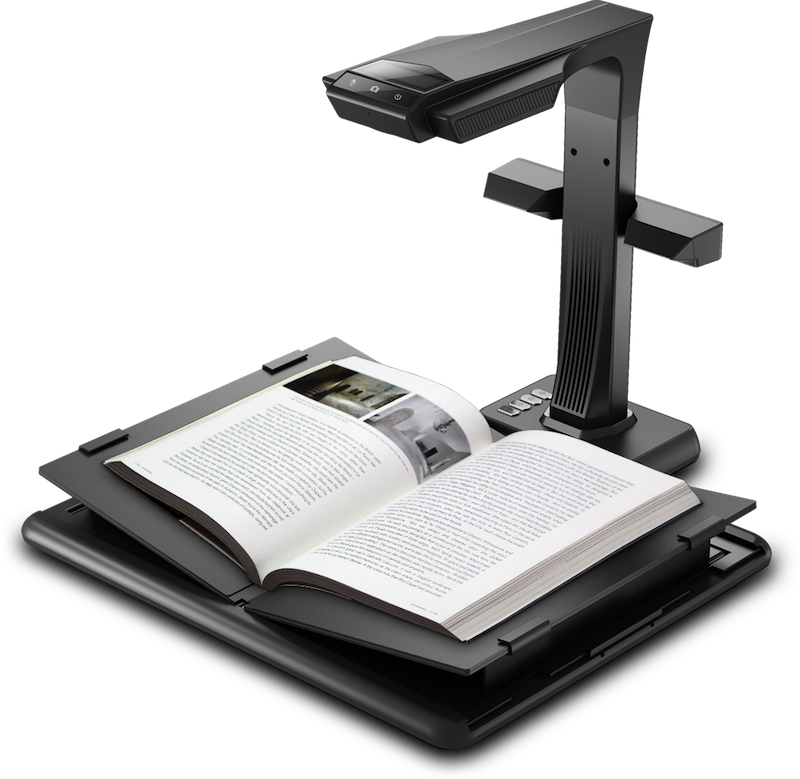
Book Scanners

Book scanners can be great scanners for books, yearbooks, the old photo albums that you can't really remove the photos from, and so on. With the book or yearbook layed flat, the scanner will take a picture of both pages and then separate them into separate pages. Each page is then combined into a single PDF formatted file for you.

Most of the book scanners have a max DPI setting of around 250 - 300 dpi, a setting tht works well for document type scanning. The DPI setting is too low for good photo scanning unless the photo is greater than 5" X 7” in size.

They are fairly inexpensive to purchase if you have a lot of scans to do. One of the "cons" is that if you have a shiny surface to your documents, that can create reflection artifacts to show up in your image scan.
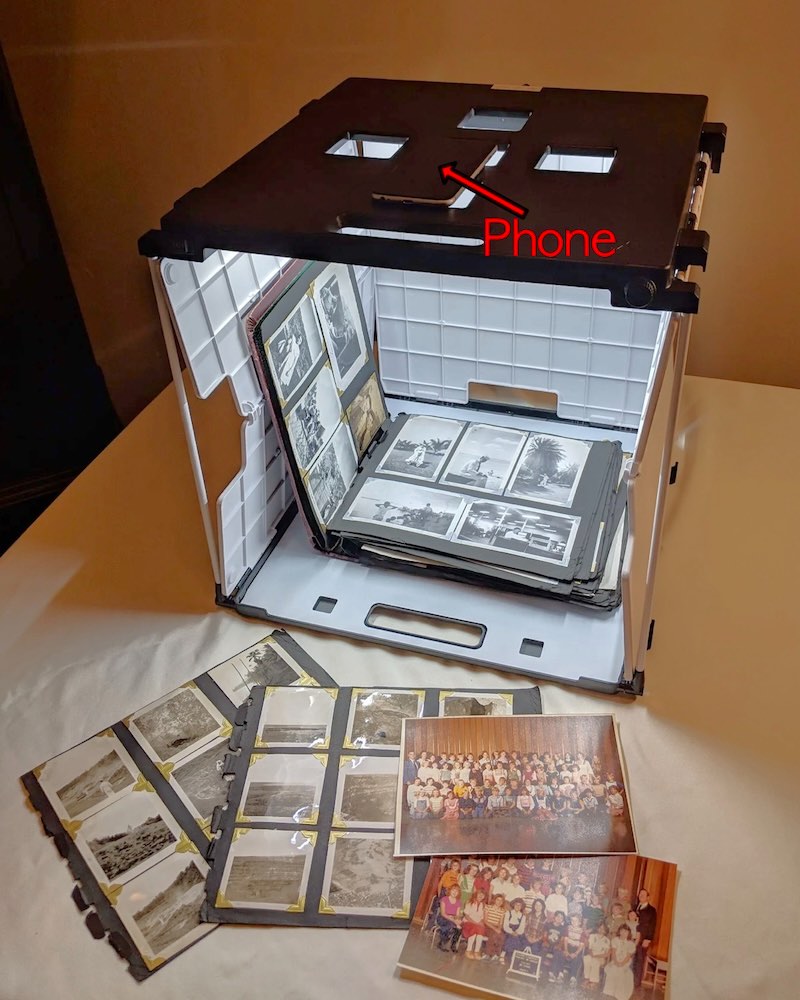
Lightboxes

Lightboxes can be quite useful to photograph a variety of different items, from albums, to objects, single photos, and more. A phone with a camera is place on top of the box and focused on the item you wish to “scan”. Because the top of the box is perpendicular to the item, no skewing of your photo will occur.

This way of “scanning” photos is much better than trying to hold your phone perpendicular to the photograph in two primary areas. There is no skewing and the light source is below the level of the camera so no shadows will occur.

Handheld Scanners

Hand scanners are really helpful to hand scan smaller documents while away from home. Years ago I went to a library in Elko, NV to go through old newspapers that had information on my McBride line. The newspapers were far too large to fit on even the largest flatbed scanners. Using the wand scanner, I was able to scan the articles that I needed from the newspaper.

As shown in the photo, there can be a "dock" where you place the hand scanner into it. It can then become a photo or document scanner for items up to about 8.5" wide. The dock feeds the photo or document automaticallly and produces an image of them. The DPI settings are 300, 600, 1200 and can result in some nice image quality.

There is a rechargeable battery for the hand scaner portion, but the dock requires a USB cable and power charger. They can be very handy when traveling on the road and visiting libraries along the way.
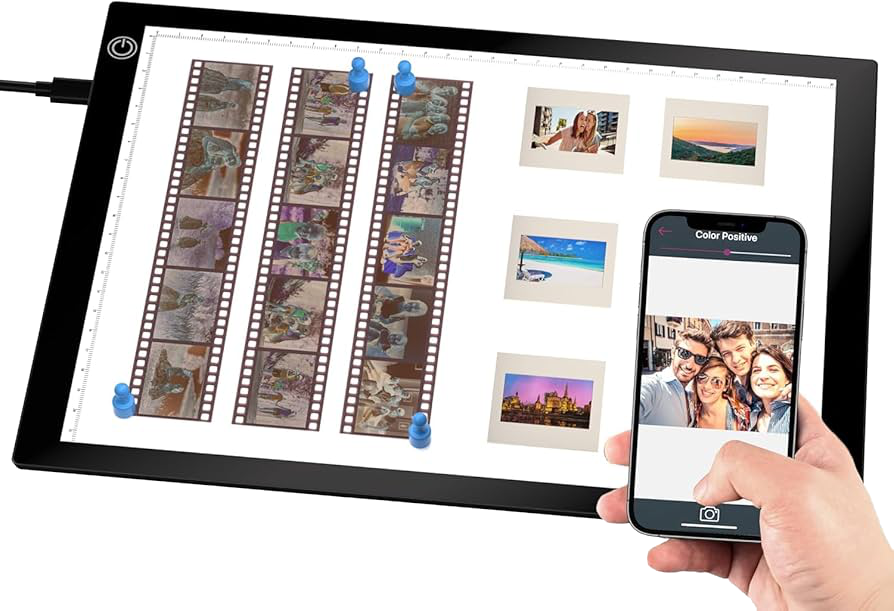
Light Tables

Light tables are quite helpful to scan negatives, especially larger format ones, as well as slides, with your smartphone. The quality of the scans can actually be quite good. These light tables are very inexpensive, about $30. As long as the camera on your phone is at least 12 megapixels, the quality of your photos will generally be good.

The only major drawback with this is that as you try to hold the camera steady and perpendicular, you will still get some skewing of your photos. Putting the camera on a tripod can help with this stability.

Image Resolution & Quality

The photos below demonstrate how important it is to properly set the scanner dpi or resolution setting. A 4"x6" photo was scanned at 300 dpi and 600 dpi to show the comparison differences. I then zoomed in on the teeth to show the quality difference. You can easily see “pixelation” or small squares appear in the 300 dpi scan. The photo scanned at 600 dpi looks sharper around the edges and smoother overall at the same zoom ratio.

Important Point: Should we scan all of our photos at the higher dpi settings? No…as this depends on different variables that we will discuss further on this page.

Low Resolution Scan @ 300 DPI

Higher Resolution Scan @ 600 DPI

Understanding Image Resolution

Let me define the term "resolution". Resolution is calculated by multiplying the number of horizontal pixels times the number of vertical pixels in a digital image. For example, a scanned image with 400 horizontal pixels and 800 vertical pixels would have an image density (or resolution) of 320,000 pixels. This is actually a very small image resolution.

The term “dimensions” is simply the number of vertical or horizontal pixels. The scanned image we just described would be described as having dimensions of 400 by 800 pixels. So, resolution and dimensions are two different things.

A typical computer monitor has a image density or resolution of 2,073,600 pixels or ~2 million pixels (1,920 horizontal pixels X 1,080 vertical pixels). The image described above, when zoomed in to 100%, would only fill about 15% of the computer screen. If we zoomed in 6X, the image would almost fill the computer screen, but a tremendous amount of pixelation would be seen. The pixel density (resolution) in an image is therefore important.

It’s an easy calculation to make.

First calculate the image resolution. For example, if the image has a horizontal dimension of 1000 and a vertical dimension of 500, the resolution or image density is 5,000 bits.

Next we multiple that resolution by the color depth. For a 24 bit color image, we simply multiply 5,000 X 24 = 120,000 bits. Dividing by 8 to convert bits to bytes would result in a .For an 8 bit grayscale image, multiply 5,000 X 8 = 40,000 bits. Convert bits to bytes by dividing by 8. The color image

What Does the Scanner’s “DPI” Setting Mean?
How Does it Relate to Image Resolution?

Scanners have to convert a physical image into a digital one. The dpi (dots per inch) setting is a way to tell the scanner what kind of dimensions we want an image to have. The higher the dpi selected, the greater the horizonatal and vertical pixel density of the output image will be.

This is by far the most common error that people make in scanning their photos. They do not choose an appropriate DPI setting on the scanner for the size of their photos.

What DPI Setting Should I Use?

I could go into a lot of detail about how to actually calculate the most optimal DPI setting, but let’s keep it simple. Most “rapid scanners” only have 3 basic DPI settings, 300, 600, 1200. A flatbed scanner will have a much larger selection to choose from.

Let’s say that we would like our photos to display at full screen after scanning them. Remember that a typical computer monitor has 1,920 horizontal pixels (basically ~2000 pixels).

For a 8”w X 10”h photo, simply calculate 2000 divided by 8 = 250 dpi. Round up to the 300 DPI scanner setting.

For a 4”w X 6”h photo, simply calculate 2000 divided by 4 = 500 dpi. Round up to the 600 DPI scanner setting.

For a 2”w X 3”h photo, simply calculate 2000 divided by 2 = 1000 dpi. Round up to the 1200 DPI scanner setting.

How about a 1” X 1” photo? Using same calculations, the result would be a 2000 DPI scanner setting. These type of photos are typically better scanned with a flatbed scanner. The flatbed scanner app will have DPI settings up to 12,800. You could choose the 2400 DPI scanner setting.

Calculating more exact settings is actually quite easy to do. In reality, it probably doesn’t make a big difference in how precise we calculate the DPI setting to be. Just don’t go too overboard with higher DPI settings or you may begin to introduce other artifacts into your scan.

Higher DPI settings will also greatly increase your final image file sizes AND image artifacts like color distortion, dust flecks, and so forth will begin to show up. Also remember that a poor quality image to start with, is not going to improve by scanning with higher resolution. It will oftentimes look much worse.